Take Next
Take Next is used to get Tasks from the Queue, so the Mate can work with them. When a Task is taken, it is locked for other users and other Mates, to make it clear that the Mate is working on the Task now for all other parties. As the name states, Take Next will return the next (and thus first) task in the Ready queue. Once a Task has been taken, it must be returned using either Solved, Manual, Error or Retry. The Mate, and the API, is blind to all other queues.
Details
Once the queue is empty, a 'dummy' Task object will be returned with TaskId = -1.
The queue is sorted by ActivationDate, with the oldest ActivationDate first. If the process has Deadlines enabled, then the queue is sorted with the earliest deadline first.
A task will be ignored in the queue if: - The task is locked - The task is not active - meaning the ActivationDate is in the future.
Finally, if a Task has already been taken and is sent back in the queue with Retry then it will be returned to the bottom of the queue. This way, if you have a large queue with hundreds of items and one or two tasks are being troublesome, those tasks will not block the other tasks from being solved until the retry count expires.
Calling TakeNext will automatically start a run if there is no on-going run, or resume an on-going run. Likewise, calling TakeNext once the queue is empty, will automatically close the ongoing run as there is now no more work to be done for the Mate. In other words, if you have a Process with Tasks enabled then you will not need to use StartRun or FinishRun as TakeNext takes care of this functionally automatically.
Use OkToRun as early as possible
It is still a very good idea to call OkToRun as early as possible in your robot script. OkToRun will check if there is any tasks in the queue, and will tell you if there isn't. This way, it is possible to short circuit the robot if there was no tasks anyway.
TakeNext returns a Task object that is specific to the selected Process. It will always include a taskId, reason, runId and processKey. The rest depends on the individual Process configuration.
    {
        "taskId": 1,
        "reason": "Reason Example",
        "runId": 1,
        "processKey": "myProcessKey",
        "coreSystemKey": "key value as string",
        "dropdownField": "Dropdown example",
        "textField": "Text example",
        "numberField": 999.99
    }
TaskId is used to identify the task in future actions. RunId identifies the current run. It can be used for logging purposes locally, or to finish the run. ProcessKey is included as a confirmation on where the Task came from. Reason is the current reason the Task has, which can also be seen in the UI under Queues. It is possible to update the reason with Retry, and can (optionally) be used to keep a state on the Task, in case you need to resume a task at a later point and it makes sense.
The rest of the fields depends on your current Process configuration, and will be different from process to process.
Example
The endpoint is found at https://{clientId}.anymate.app/api/TakeNext/{ProcessKey}. The http-request must be submitted as a GET.
curl --request GET \
        --url https://{clientId}.anymate.app/api/TakeNext/{ProcessKey} \
        --header 'Authorization: Bearer eyJhbGciOiJSUzI1NiIsImtpZCI6IjgyQ0JGNDY3NEMyMUExRjBCMjhFNzlBNTk5M...'
Using the Anymate .NET SDK, once the AnymateService is created, fetching a Task is done with the TakeNext or TakeNextAsync method.
When using the default overload, GetRules will return a string with all rules as raw JSON making it easy for you to deserialize it as you please.
If you provide a type argument (client.TakeNext<**Type**>(processKey)) then AnymateService will deserialize the json automatically.
using Anymate;


// Code before omitted

//Initialize AnymateService
var anymateService = new AnymateService(client_id, client_secret, username, password);

//Take Next Task. In this example, we have a model called 'MyTaskModel' that we give as argument to automatically have the Task deserialized as.
var task = await anymateService.TakeNextAsync<MyTaskModel>(processKey);

//Assign the TaskId to a seperate variable
var taskId = task.TaskId;

// Code after omitted
Using the Anymate Python SDK, simply invoke the take_next function in anymate.client.
import anymate

# code omitted

# Initialize the client
client = anymate.client(client_id, api_secret, username, password)

# Invoke take_next, and get the task as a dict
task = client.take_next("myProcessKey")

# Read the TaskId of the new task
taskId = task['taskId']

# check if queue was empty
if taskId < 1:
    # Queue was empty
    return

# Perform business logic
take_next returns the Task as a dictionary.
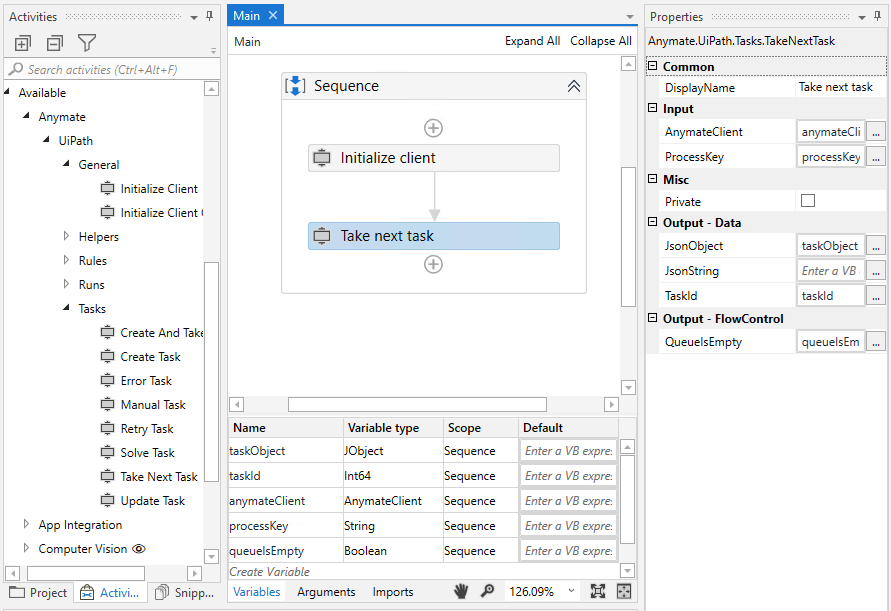
Using the Anymate UiPath SDK, simply invoke the Take Next Task activity.

Take Next Task will return a Task object in the format of a JObject, where each key/value can be invoked similar to how it would be done with a Dictionary. It is also possible to get the Task out as a JSON formatted string.
To check if a Task was returned, you can either see if TaskId is above 0 or if QueueIsEmpty is false.